Thursday, 23 April 2015

Week 2 Sessions: Assessment of your Preproduction & Basic Shooting Techniques for Short Film


Here are further examples of how you will layout your blogs for the remainder of my units.
http://rosiedunkley.weebly.com/unit-1-pre-production-techniques
http://50172455.blogspot.co.uk/

How to upload your production documents to slideshare and embed them in your blog


How to upload to slideshare and embed in blogger from Daybird1987

1. Remember to use your production group gmail account to sign up to slideshare - don't use your personal email 

2. Remember to share your log in and passwords with everyone in the group. This cannot be used to justify not submitting your contribution to the group work. 

3. As a member of the group - it is your responsibility to post your work to the blog.

Wednesday, 22 April 2015

Example Level 3 Btec Student Short Film

https://www.youtube.com/watch?v=tWze9Fq5j1k

BTEC Rules for Deadlines & Feedback


Submisson Results Pre-production Folder


Task 1
Pre-production Portfolio
Deadline 21.4.15
Emmanuel Bryan and Simone Coroma
Anthony Gonzalez, Michelle Baker and Lucy Young
Aoife Brown, Melissa Harper and Micah Pollard
Hannah Bamgbala and Chilapi Bwalya
http://img1.blogblog.com/img/icon18_wrench_allbkg.png
A full shooting script including all shots, action and dialogue
Emmanuel
Merit
 Lauren
Anthony

Aoife,

Laolu,
Merit
Hannah,
Merit
Identify production roles and write a full explanation and justification as to why
Emmanuel & Simone,

 Stevie
Anthony
Aoife,

Tanim,

Chilapi

List the actors for your film and justify why they were chosen
Simone
Pass
 Niamh
Michelle,

Micah,

Tanim,

Hannah,

Storyboard
Simone,
WT
(incomplete 9 shots for 5 min film?)
 Lauren & Stevie
Lucy,
Pass/Merit
enough shots 5 min film?
Melissa,
WT
(incomplete)
Liam,
WT (incomplete)
Chilapi,
Merit
Shot List
Simone,
WT
(incomplete 9 shots for 5 min film?)
 Niamh
Lucy,
Pass/Merit - enough shots?
Melissa,

Laolu
Merit
Chilapi,
Merit
Location recce & risk assessments
Simone,
Pass
 Niamh & Stevie
Anthony,


Micah
WT
(incomplete)
Clifford,
Pass/Merit
Hannah

shooting schedule including details of all cast, crew, equipment, costume and props for each individual shoot
Emmanuel


 Niamh
Michelle,

Melissa,

Clifford,
Pass
(in set-up/ shoot order, address?)
Chipali

Call Sheets
Simone
WT
(incomplete)
 Lauren
Anthony

Aoife,

Liam
Chipali

Actor release forms
Emmanuel,

 Lauren
Michelle,

Aoife,

Tanim,

Chipali

Location release forms
Simone,

 Stevie
Michelle,

Micah

Clifford,
Not completed
Hannah

Production Log *(individual)

Post-production: Colour Grading Your Footage


Lighting Techniques & Using Natural Light for Meaning and Mood


Merit: Attempts to use lighting as a method of generating mood, atmosphere or meaning but may be limited to certain shots


Distinction: Artificial lighting may be used creatively to generate mood, atmosphere or meaning


Lighting Techniques from Basic Video Production


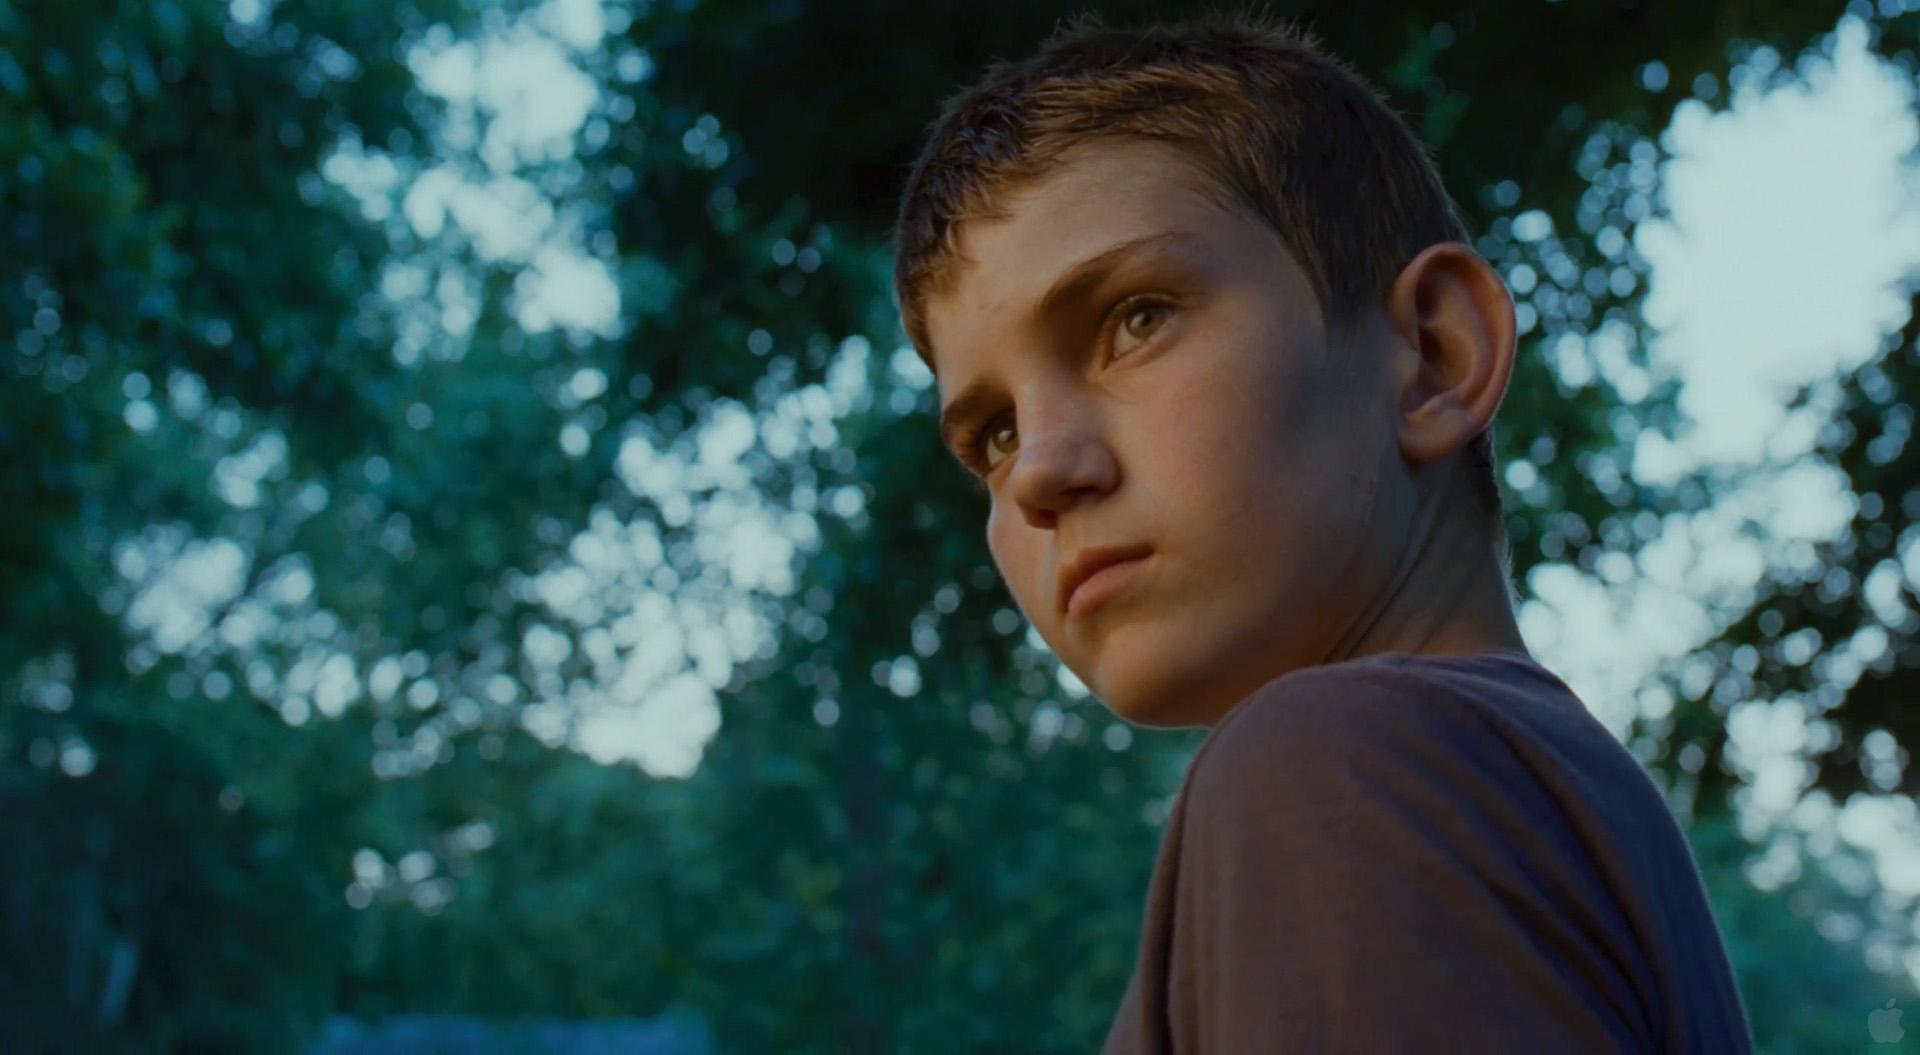
#1 – Make the Sun your backlight
For daytime exteriors, having the sun behind your actors or subjects is crucial. Watch any large scale feature film that is shot in available light and you’ll notice this is done in nearly every exterior day shot, and for good reason. One of the ugliest looks you can get when shooting with natural light is to have your actors faces blown out with harsh sunlight beating down on them, creating nasty shadows and unflattering images all around. By positioning your actors in a way that places the sun to be behind them to hit the back of their heads, you are essentially doing two things. First off, you’re protecting their face from taking in all of the sunlight which will not only make them look bad, but also cause them to squint. And secondly, with the sun behind them, they will naturally have a backlight that will separate them from the background and create a nice rim around their heads, with nice even lighting on their face.


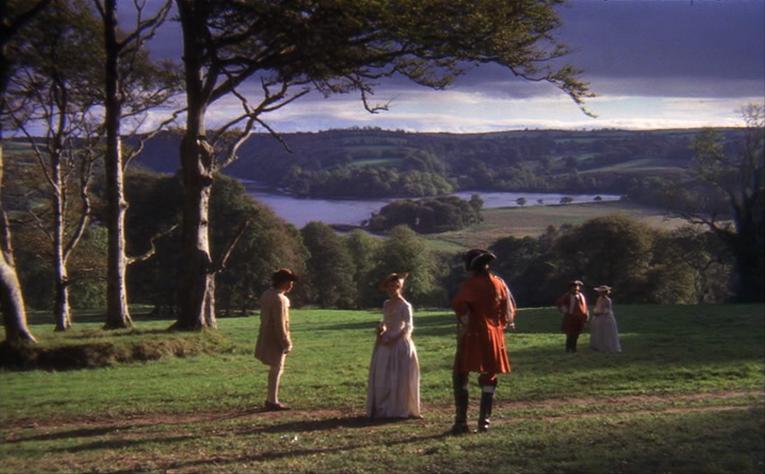
#2 – Shoot during Blue Hour and Magic Hour
Blue hour is the short window of time after the sun goes down (or before it comes up) where the sky is still colorful, but the sun isn’t visible. And Magic Hour of course, is the hour leading up to sunset or just after sunrise. Both of these times of day are ideal for shooting as the natural quality of light outside at that time of day just can’t be beat. The trick is to  utilize these two times of day for different purposes. For example. Blue Hour is ideal when you need to shoot a short night time scene, but don’t have any lights. There is enough ambient light in the sky to provide definition on your actors while at the same time leaving the environment quite dark, giving the feeling of night time. Car headlights, houses with lights on and other artificial sources in the background will be completely visible during blue hour, helping you to sell that it is night time. Magic hour is really great for scenes that you would normally shoot in the day time (they don’t need to be sunset shots). It will simply make your life easier by providing a very soft and forgiving, warm natural light that will make your scene glow and feel somewhat, well, magical.


the-tree-of-life-12


#3-  Rehearse, rehearse, rehearse
If you plan on working with available light you need to be aware that you will not have all the time in the world to get any given shot. Your light source is constantly moving around and in the case of Blue Hour or Magic Hour, dissapearing very quickly. The only way you are going to be able to get what you need to get during this time of day is to have your actors perfectly rehearsed. I’ve been in situations where we have 15 minutes until we lose all light from the sun and the actors aren’t prepared. They drop lines take after take and I’m left scrambling to shoot parts of the scene line by line to ensure that we get everything in the can. This is never ideal and in some cases it may mean that you don’t complete your scene and you need to spend another full day doing re-shoots. So make sure your actors are exceptionally well prepared. Take the extra time during rehearsal because you certainly won’t have it on set.


#4 – Choose the right locations
This also may sound obvious, but time and time again indie film makers will make the mistake of getting lazy when shooting with natural light. Not having lights doesn’t mean you can just shoot anywhere and slack off in other areas of production. You need to spend a good amount of time picking locations that will work with available light. For example, if you’re shooting an interior of a bedroom scene in the middle of the day, you need to make sure that room has enough light coming in. Is there a window in the room? A skylight?  Is there a tree outside that will block the light after a certain time? All of these little questions are critical to ensure that the locations you are choosing will work. It is also importnat that you do camera tests at these locations. You may have a parking garage that you want to shoot in. But the type of lighting they are using may cause strobing with your camera, or maybe it is just too flat. Choose locations that will lend themselves well to shooting without lights.
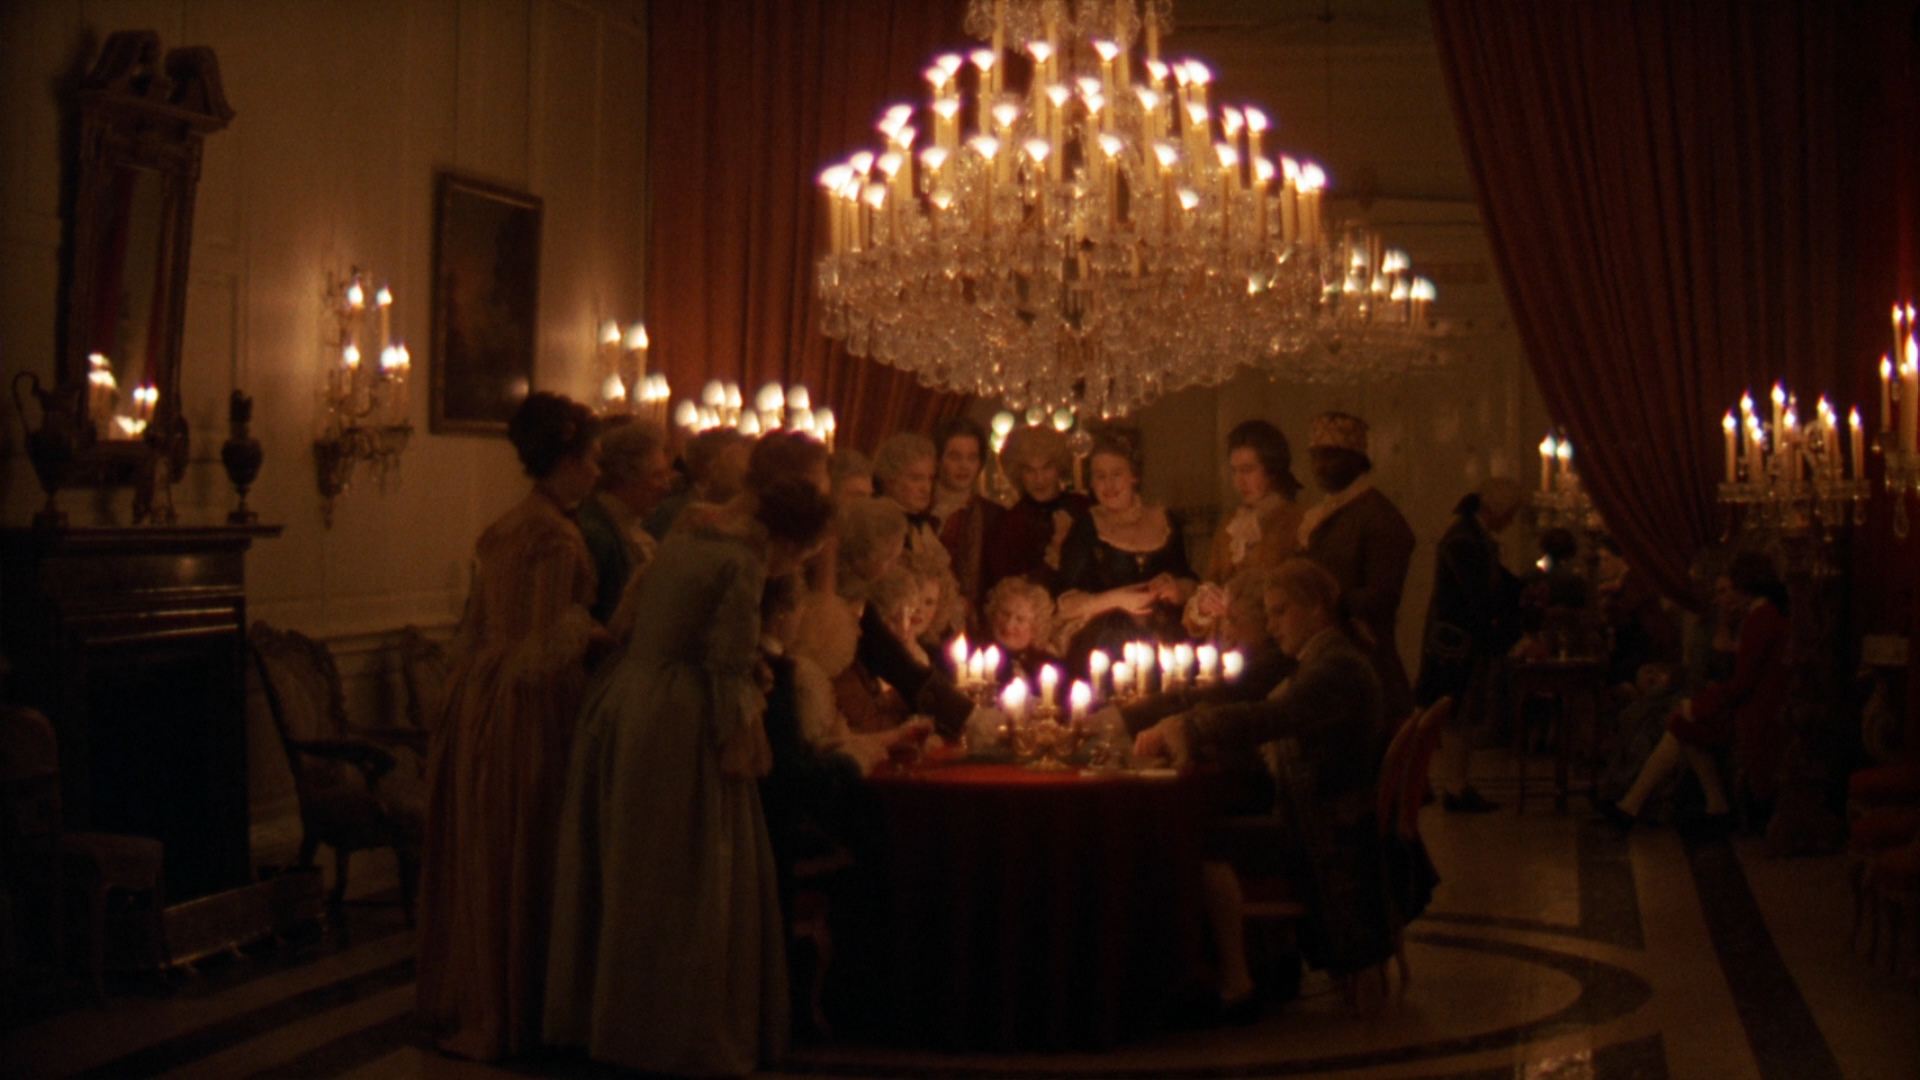

barry lyndon


#5 – Use practicals
Much of this post has focused on exteriors, or lighting interiors with daylight, but what about interiors at night? Practicals (lights that are visible in the shot) are your friend here. You may want to use something as simple as a lamp, positioned stategically next to your actor to give them a key light. Or in another scenario, you may have a character sitting in the driveway while another is inside watching TV – in this case you can likely use the car headlights to shoot light through the window. Or it may be as simple as using a dimmer switch when shooting inside a house. This can do a lot as you may want to dim just the background lighting and leave more lights on in the main area as fill for your subject. Using dimmers really helps to control lighting with ease.


large_barry_lyndon_blu-ray_8


#6 – Use Reflectors and Flags
This is an obvious one, but there are going to be many scenarios where you need to fill in light, create negative fill, or add a splash of light in the background. If you don’t have lights, your only option are reflectors and flags. These can be inexpensive foam core boards that you buy at your local art supply store, or professional quality mirror boards and floppy’s from an art supply store. Choose what you need based on the budget and constraints of your project, but be sure to have these tools available to you. If you’re outside on a bright sunny day and your talent is completely washed out in sunlight, you’re going to want to use a flag to create some negative fill to give contrast to the actor’s face. Or conversely if your actor is side-lit and your camera isn’t picking up detail in the shadows, having that bounce will be crucial. Using flags and reflectors is one of the number one things that indie “natural light” productions don’t seem to pay enough attention to, and you can always spot it a mile away.

#7 – Preparation is key
Arguably the most important point on this list. You absolutely need to set aside more prep time to plan for your natural light shoot. If you’re going to shoot in a parking lot, you need to go there before hand and see how the light hits that parking lot at every hour. You need to know if there is a building casting a shadow, and if so whether that is good or bad for your needs. You need to know your sunrise and sunset times off by heart and be prepared to work quickly under those tight windows of time you have open. I mentioned above the importance of rehearsing your cast, which falls into this category as well. But  what is just as crucial is having your crew prepared and ready to go. When shooting with available light, especially during Magic Hour, you literally have minutes to get the shot you need. So make sure you are prepared, set up on time or early, and ensure the crew is ready to go and the actors know their lines. From there, it’s up to you to make the magic happen.


children-of-men-baby1


In Summary
Shooting with natural light can be a very liberating way to approach the craft of film making but you will only get these results if you plan properly - know where the sun is going to be.


If your story calls for a very organic, natural look than using available light can be one of the best choices you’ll make as far as the aesthetics of your production, than take the necessary steps to make it look beautiful.

Tuesday, 21 April 2015

How to set up a blog on blogger


Instructions

Create a new Gmail account - email me the log-in and the password. r.barton@ctksfc.ac.uk Everyone is your group must be able to access this to post their work.

1 Go to the Blogger website. https://www.blogger.com
2 Click on "Create your blog now." From that page you will create a Google account. If you already have a Google account, you can sign in to Blogger with your Google account. If you do not have a Google account, then fill out the form to create one. Click "Continue" when finished. 
3 Title your blog 'Level 3 Btec Short Film' & your Production Company name 
4 Choose your blog address after creating your title. Make it something easy you can remember.Once you have completed these steps, click "Continue."
5 Choose a template that you desire from their template gallery. Choose a color and style that will fit the mood of your blog. After this has been finished, click "Continue."
    • 6
      Now, your blog has been created. From here, you can begin posting to your blog by posting information, little pieces of your life stories or instructions on how to make something. To post your first blog, click, "Start posting."


Wednesday, 15 April 2015

Photo-Storyboarding Task

Tutorial: AKVIS Sketch

Creation of a Short-Film Storyboard

 The author of this tutorial is T. Skaarup.
This tutorial was created using the AKVIS Sketch plug-in with the Adobe PhotoShop photo editor.
Motion Pictures, TV Commercials, You-Tube Videos, Music Videos, Stage Plays, and other productions that require extensive planning often use "Storyboards". Storyboards are similar to very basic "comic books" of the action with a few important differences. Storyboards:
  1. Take into account the POV (Point-of-View) of the Camera or Audience. The location and motion of the camera is represented. This helps the Cinematographer map out the course of the filming. It also helps determine if a crane, rail, hand-truck, or gyro-stabilizer will be needed.
  2. Take into account the necessary motion of the Actors or Props. This helps the Director tell the story without words. Storyboards can be very a powerful tool when used correctly.
  3. State the dialogue that needs to spoken during the Scene. Helps determine what is essential for the story and prevents mistakes such as making the actors speak dialogue while running, climbing, dancing, etc.
  4. Are black-and-white. Color is only used when an item in the scene absolutely requires (for the story) to have a color. When the color is not stated it gives the Set Designers, Costumer Designers, Prop Department and others a greater amount of freedom. When a color is given in the Storyboard then that color is essential to the story.
  5. Are Low-Resolution. The images should clearly convey the action in the scene. But the Storyboard image should not overpower the story itself. Clear and Simple images are the best.
AKVIS Sketch can dramatically simplify and speed up the process of creating a storyboard by using low-resolution digital camera images to create the Storyboard scenes.
Final Storyboard Mock-Up Page
  • Step 1. Plan out the necessary locations, scenes, motion and dialogue of your story. Once you have determined the story you want to tell try to reduce it into still images and then consider the motion. Try to put the story into a linear time-frame as it appears to the audience. Using a blank Storyboard page to scribble on can be helpful. You’ll find that you will change how you tell your story when you use a digital camera to walk through the major scenes by taking pictures. Here are some images (shown in the order they were taken) of two friends who want to get together after school to play piano.
    Original photos for storyboard
  • Step 2. Import your individual images into Adobe Photoshop. Now compress the images to a small size (about 20% the original size), in this case, about 975 pixels wide (Image -> Image Size). Compression is done to purposefully lose detail that would distract from the essential purpose of the scene.
    Calling the menu Image Size
  • Step 3. Create a new layer and add annotation arrows and text if necessary. Arrows can be found in the Custom Shape Tool. Open the Custom Shape Tool.
    Selection Custom Shape Tool
    The Tool menu bar will show the currently selected shape. Click on the little drop menu which appears next to the Shape representation . Choose one of these arrows. Set the foreground color to a neutral gray. Draw an arrow using the Custom Shape Tool. Make the tip of the arrow slightly smaller and asymmetric using the Edit -> Transform -> Distort.
    Changing the shape of arrows
  • Step 4. Set the foreground color to black. On this arrow use the Text tool to write the word "follow" in a hand script font such as Mistral. Merge the top two layers so that the arrow and text are on the same layer.
    Adding text
  • Step 5. Apply a light effect to this layer by using Filter -> Render -> Lighting Effects.
    Adding lighting effect
    Set the foreground color to black. Now apply an outline of the arrow by using a outline stroke of 3 pixels Edit -> Stroke. Lighting effects give the arrow a sense of hand-drawn character and distinguish them from background images. Flatten the image.
    Ready-color image
  • Step 6. Use AKVIS Sketch to convert it to a black-and-white sketch (Filter -> AKVIS -> Sketch). Use the following settings:
    Settings Panel in AKVIS Sketch
    Use similar steps to annotate and convert the remaining images. Save these final JPEG images under a unique name for easy retrieval.
    Transform photos into a sketch
  • Step 7. Open the AKVIS Storyboard Template in Adobe Photoshop. Save it under a new name so that modifications do not alter the original template. The placeholders for the sketch in the Storyboard Template are 975 pixels wide by 650 pixels high.
    A fragment of a storyboard template
    You can use the Rectangular Marquee Tool with a Fixed Size Style to select the exact size of the Template window. Open one of the final sketches, copy a selection the same size of the Template window to the clipboard, then return to the template and paste the image into it’s own layer. Move it to the bottom of the layers list.
    Selection of a fragment of a sketch
    Copy each of the sketches as a separate new layer on the Template. Keep the sketch layers at the bottom of the Layers palette.
    Filling out the template storyboard
  • Step 8. Once the sketch images have been placed, fill in all necessary information to complete the scene. Expand the ENTER Production Info and ENTER Cell Info and double-click on the text icon to edit the scene information.
    Adding text information
Storyboards will save you an enourmous amount of time and a ginormous amount of frustration when you’re planning any motion picture, television commercial, music video, You-Tube video, or stage play.

Short Film description of what the levels for Pre-production & Production/Post look like


M2:
learners will produce a narrative with some imagination and produce competent plans for production.
They will produce pre-production plans which are realistic and effective. Scripts and treatments will use appropriate formats.

Production schedules will be competently organised with realistic deadlines and some
contingency planning. Risk assessments will be realistic and contain some detail.

The narrative will show imagination in both, or either, content and form. The standard harmony-disruption-harmony structure might be used, but a story might have a twist that engages the audience, or narrative structures might use non-linear techniques to tell the story. However, aesthetic issues, such as location, ambient sound and lighting will not be fully explored.
M3:
learners will produce a single camera product to a good technical standard. They will show confidence and facility in their use of the equipment. The work will have been approached methodically and thoughtfully.
The product will show some imagination in its realisation with some evidence of experimentation in both editing and cinematography. For example, the use of high and low angle shots, showing vulnerability and dominance, will be used appropriately within the narrative. A mixture of shot sizes will be used to generate interest and create meaning. The lap-dissolve might be used as an appropriate alternative to the cut.

Attempts to use lighting as a method of generating mood, atmosphere or meaning might be apparent, but may be limited to certain shots, rather than being employed consistently throughout the production.
M2 and M3:
learners will still be working within recognisable generic conventions, but there will be some imaginative thought behind the work so that technical skills and codes and conventions will be employed with some inventiveness. When engaged in practical activities, learners will need little assistance, though typically they will still need some support when dealing with more complex technology or trying to apply more sophisticated techniques.

D2:
learners will produce creative scripts and plans that reflect professional practice. Pre-production
paperwork will be well organised showing good resource management and anticipation of potential difficulties.

Production schedules will be detailed and set realistic deadlines. Scripts and storyboards will be carefully prepared and thoroughly thought out. Contingency plans will be in place to cover unforeseen circumstances.

Risk assessments will be detailed taking into account all health and safety issues and addressing them properly. Aesthetic considerations will also be detailed, taking into account the fitness for purpose of all the locations used.

Alternative narrative structures might be used with flair to produce interesting or different formats.

D3:
learners will produce a finished product the technical quality of which reflects near-professional practice:
Cinematography, in terms of image size, camera angle and movement will be creative
and fluent.

Varied editing techniques, such as cross-cutting and montage, will be thoughtfully used to inform
the narrative and in such a way that the intention behind the use is clearly meaningful. Any dissolves and transitions will be employed effectively and for a reason that links to the story. Like cinematography, editing will be fluent with very few, if any, continuity errors.

Artificial lighting may be used creatively to generate mood, atmosphere or meaning.


D2 and D3:
learners will apply their technical and creative skills not just with imagination but with ingenuity
and even elegance, and codes and conventions will be used with occasionally surprising results. In all practical activity distinction grade learners will be capable of working autonomously and effectively.

The term ‘working independently’ means that they are able to work on their own initiative, do not need constant support or supervision, give the work their full commitment, work positively and cooperatively with others, and meet deadlines. In other words, they have the kind of self-management skills that would be expected of them in a professional context.

Unit 1: Pre-production Techniques

M2:
documentation will cover all the procedures relevant to the type of production being undertaken in some detail. It will be presented carefully and neatly, and will be organised clearly.
M3:
learners will demonstrate that they can undertake pre-production work that enables the efficient completion of the product. It should be noted that the quality of the resulting product is irrelevant to the assessment of this unit.
D2:
documentation will be comprehensive and thorough with a detailed breakdown of all procedures relevant to the type of production being undertaken. It will be very well-organised and presented to a standard that approaches professional practice.
D3:
learners will be able to apply their pre-production planning to the proposed production to a standard that approaches professional practice, for example, ensuring that all the resources are in the right place at the right time.

Their planning will enable the successful completion of the product
D2 and D3: learners will be capable of using their own initiative, will not need constant support or supervision, will give the work their full commitment, work positively and cooperatively with others, and meet deadlines.